Fixing the “Backing Not Supported” RDM Error Before It Kills Your Migration
The Trigger: When the Migration Hangs
You know the feeling. It’s Saturday morning, the maintenance window is open, and you are 98% through a “Lift and Shift” to your new HCI cluster. You highlight a batch of 50 VMs, click Migrate, select the destination storage, and hit Finish.
Then, vSphere punches you in the face with this:
“Virtual machine is configured to use a device that prevents the operation: Device ‘Hard disk 1’ has a backing that is not supported.”
If you are lucky, it fails immediately. If you are unlucky, it hangs at 15% for an hour before failing, leaving you with a locked VM and a stale snapshot.
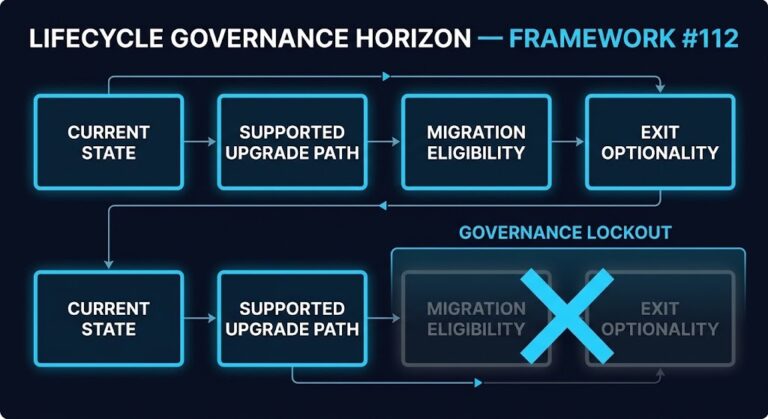
This is almost always caused by a Physical Raw Device Mapping (pRDM). Unlike virtual RDMs (vRDM), physical RDMs expose the underlying storage hardware directly to the Guest OS. vSphere cannot snapshot them, which means vSphere cannot vMotion them.
This effectively breaks any snapshot-based migration tool (Veeam, HYCU, Nutanix Move). You just hit a hard stop on your cutover.
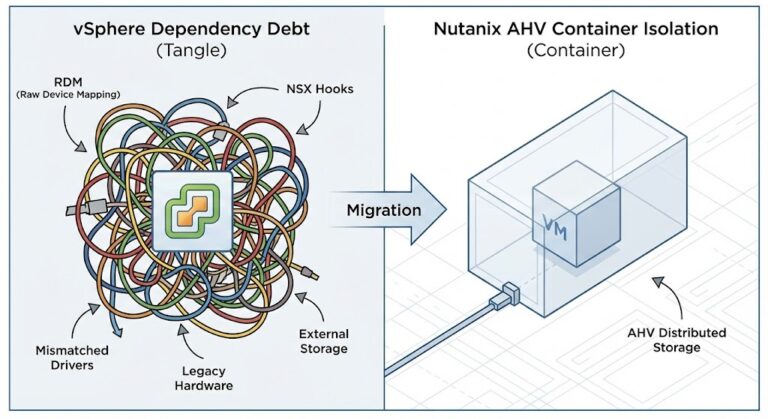
The Mechanics: Why Physical RDMs Break vMotion
Why does this break? Because you are asking the hypervisor to do something physically impossible.
When you use a Physical RDM, you are bypassing the VMFS layer entirely. The VM isn’t writing to a .vmdk file; it’s writing SCSI commands directly to a LUN on your SAN.
When you initiate a Storage vMotion, ESXi tries to copy the data. But with a pRDM, ESXi doesn’t own the data—the Guest OS does. ESXi only owns a tiny “pointer file” (mapping file).
The “Lift and Shift” Lie This is the classic failure mode of the “Lift and Shift” strategy—assuming that logical VMs map 1:1 to physical storage. Because vSphere cannot quiesce the disk, you avoid the usual Snapshot Tax that kills performance, but the trade-off is you are effectively anchored to that specific SAN LUN.
The Manual Fix (The Painful Way): To fix this manually, you have to perform surgery on the VM:
- Shut down the VM (Downtime required).
- Remove the RDM pointer from the VM settings (do not delete from disk).
- Migrate the VM (OS disk only) to the new cluster.
- Re-zone and re-present the LUN to the new cluster.
- Re-attach the RDM.
That works for one SQL server. But if you inherited a mess of an environment with 500 VMs, you are not going to finish this migration this weekend.

The Solution: Audit Before You Move
We need to stop treating this as a “one-off” error and treat it as a fleet-wide contamination. You need to identify every single pRDM in your inventory immediately.
Option A: The PowerCLI Method If you have console access and the permissions, you can hunt them down with this snippet. It loops through every VM and checks the DiskType for the specific “RawPhysical” string.
PowerShell
Get-VM | Get-HardDisk | Where-Object {$_.DiskType -eq "RawPhysical"} | Select-Object Parent, Name, Filename, DiskType
Option B: The Forensic Audit (The Fast Way) If you don’t want to run iterative scripts against a live vCenter (or if you are an MSP waiting on credentials), I built a logic engine that rips this data out of your RVTools export.
It parses the .vinfo and .vdisk tabs to find the specific “Backing Not Supported” flags that standard reports miss.
- Export your RVTools (vCenter or ESXi).
- Drop the
.xlsxinto the HCI Migration Advisor. - Check the “Blockers” tab.
It will list every VM with a Physical RDM, the LUN ID it points to, and whether it’s sharing that LUN with another VM (clustering).
Critical Warning: If you see a cluster, do not convert it to VMDK blindly. You need a validated vSphere to AHV Migration Strategy that accounts for shared-disk locking, or you will corrupt your SQL AlwaysOn database.

Architect’s Verdict
The “Backing Not Supported” error is a rookie mistake that hits senior engineers. We get complacent. We assume everything is a clean VMDK.
But in infrastructure, assumptions cause outages.
If you have pRDMs, you have three choices: Convert (Cold Migration), Clone (downtime), or Re-Attach (complexity). The tool tells you which ones are the ticking time bombs so you can choose your strategy before you are on the bridge call explaining why the CRM isn’t moving.
Stop guessing. Audit the backing.
Next Steps:
- Audit Your Environment: Launch the HCI Migration Advisor to see your RDM exposure instantly.
- Plan the Move: Once you identify the RDMs, use our Deterministic Migration Checklist to ensure the rest of the stack is clean.
- Deep Dive: For a full breakdown of the tool’s capabilities, read our HCI Migration Advisor Technical Overview.
Additional Resources
- VMware KB 1005241: Converting a physical RDM to a virtual RDM or VMDK – The official (and painful) manual procedure.
- Broadcom Docs: Raw Device Mapping Conditions and Limitations – Why pRDMs exist and why they break vMotion.
Editorial Integrity & Security Protocol
This technical deep-dive adheres to the Rack2Cloud Deterministic Integrity Standard. All benchmarks and security audits are derived from zero-trust validation protocols within our isolated lab environments. No vendor influence.
R.M.
Senior Solutions Architect with 25+ years of experience in HCI, cloud strategy, and data resilience. As the lead behind Rack2Cloud, I focus on lab-verified guidance for complex enterprise transitions. View Credentials →
Get the Playbooks Vendors Won’t Publish
Field-tested blueprints for migration, HCI, sovereign infrastructure, and AI architecture. Real failure-mode analysis. No marketing filler. Delivered weekly.
Select your infrastructure paths. Receive field-tested blueprints direct to your inbox.
- > Virtualization & Migration Physics
- > Cloud Strategy & Egress Math
- > Data Protection & RTO Reality
- > AI Infrastructure & GPU Fabric
Zero spam. Includes The Dispatch weekly drop.
Need Architectural Guidance?
Unbiased infrastructure audit for your migration, cloud strategy, or HCI transition.
>_ Request Triage Session