Proxmox vs VMware in 2026: A Migration Playbook That Actually Works
The “Proxmox curiosity” of 2023 has evolved into the “Proxmox mandate” of 2026. After two years of Broadcom’s portfolio “simplification” — which felt more like a hostage negotiation for mid-market IT — architects are no longer asking if they should move, but how to do it without losing their weekends.
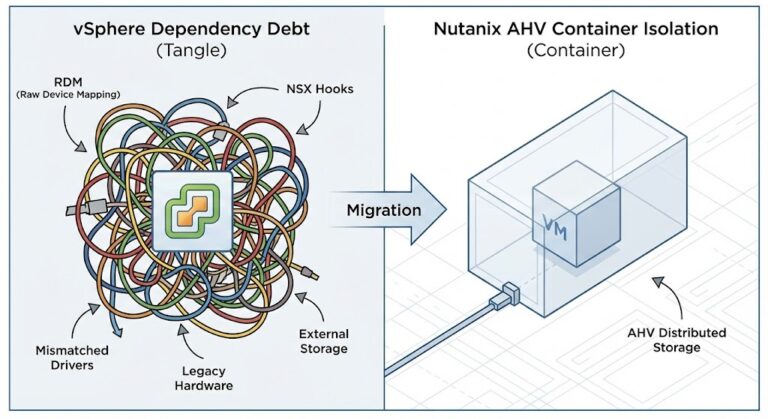
I’ve spent 15+ years watching hypervisor wars. The mistake most teams make is treating a Proxmox migration like a simple V2V task. It’s not. It’s a shift from a proprietary black-box ecosystem to an open, Debian-based stack where you are finally back in the driver’s seat — but you’d better know how to drive a stick shift.
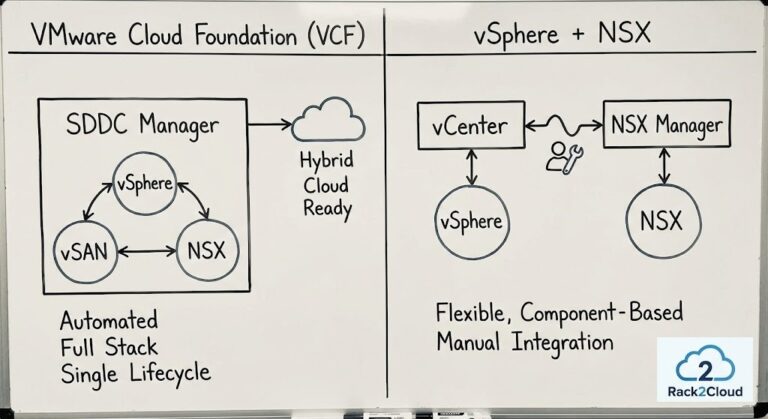
For the strategic decision framework — whether to stay on VMware, move to Proxmox, or migrate to Nutanix AHV — see the Broadcom Year Two: Stay or Go Architecture Guide. This playbook assumes you’ve made the decision and are ready to execute.
This guide is also part of the broader Modern Virtualization Learning Path — which covers the full progression from hypervisor selection through migration execution through Day-2 operational stabilization.
Brownfield Discovery: The Snapshot Audit
VMware vCenter hides sins that break KVM imports. Proxmox’s ESXi Import Wizard — significantly enhanced in VE 9.x — still chokes on complex snapshot chains. Discover these before your migration window, not during it.
The Snapshot Trap
A production VM running on a delta disk from a backup snapshot taken three years ago is reading a 50-file chain. You cannot migrate a delta. You must Consolidate and Delete All snapshots in vSphere before the migration window opens.
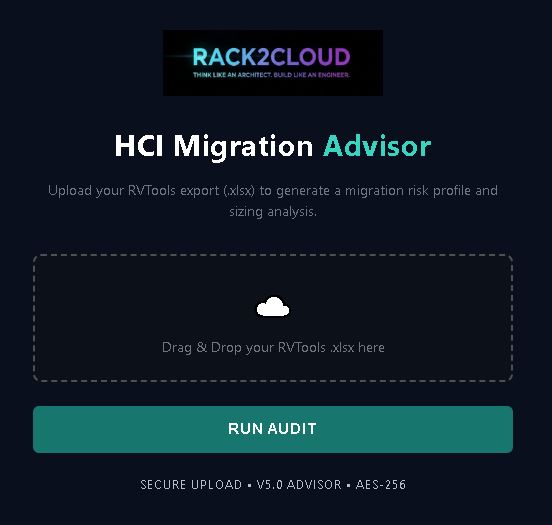
If the HCI Migration Advisor flags a locked snapshot, clone the VM to a new entity to flatten the chain before attempting the import. Locked snapshots that aren’t resolved pre-migration will silently corrupt the import and surface as data integrity issues days after cutover.
The Hardware Passthrough Trap
Identify any VMs using USB passthrough or DirectPath I/O (SR-IOV). These will not migrate cleanly — they require manual reconstruction on the Proxmox side.
Real World Example: A client with a legacy license server keyed to a physical USB dongle passed through to a vSphere VM. The migration blocked entirely until the dongle dependency was documented and the physical USB Bus ID and Vendor ID mapped to the Proxmox hardware tab.
Action Item: Run the HCI Migration Advisor report specifically for passthrough devices before sizing your migration window. These edge cases require individual remediation plans — they cannot be batch-processed.
Network Foundation: Prevent Cluster Crash
Proxmox relies on Corosync for cluster communication, which demands sub-2ms latency. If you saturate your links moving 50TB of data, nodes will fence — reboot themselves — to protect data integrity. Your migration traffic just killed your cluster heartbeat.
The Golden Rule: Physically or logically separate your traffic before moving a single byte.
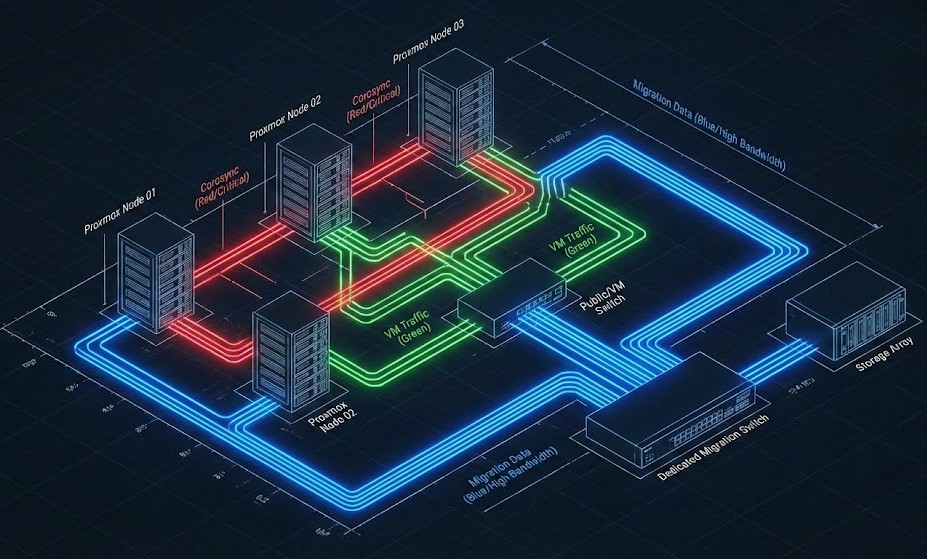
Figure 1: The “Safe Passage” Architecture. Note the physical separation of the Migration/Storage link from the Corosync heartbeat.
The Configuration
| VLAN Purpose | Speed | MTU | Notes |
| Mgmt / Corosync | 1GbE | 1500 | Heartbeat Only (Critical) |
| Migration | 10/25GbE | 9000 | Bulk Data Copy |
| VM Traffic | LACP Bond | 1500/9000 | Production Payload |
Pro Tip: Stretch L2 During Migration: Trunk your VMware port groups and Proxmox Linux Bridges to the same physical switch ports. This allows VMs to keep their IPs while the database backend stays on vSphere during the transition — eliminating the IP reconfiguration risk that forces application restarts.
For the quorum physics that govern why Corosync fences under network saturation — and the QDevice fix that prevents self-fencing during bulk transfers — see the Proxmox 2-Node Quorum HA Fix. This is mandatory reading before Week 1 of the production timeline below.
Windows Migration: The Blue Screen Evasion
Windows expects an LSI Logic controller. When it wakes up on Proxmox, it sees a VirtIO SCSI controller. Result: INACCESSIBLE_BOOT_DEVICE — the Blue Screen of Death that ends Friday night migrations.
Do not rely on post-migration repair. Fix it while the VM is still alive in VMware.
The Pre-Flight VirtIO Injection (Step-by-Step)
- Add Dummy Hardware: In vSphere, add a new 1GB Hard Disk to the VM
- Force Controller: Expand the disk settings and select VirtIO SCSI as the controller type — or mount the
virtio-win.isoand install the driver manually if the option isn’t visible - Install Drivers: Inside Windows, run the virtio-win installer. Ensure
viostor.sysandNetKVMare installed and confirmed in Device Manager - Verify: Check Device Manager for “Red Hat VirtIO SCSI Controller” — if it’s not there, the injection failed
- Migrate: Now when you switch the boot disk to VirtIO on Proxmox, Windows boots cleanly
Download the latest validated drivers from the Fedora Project VirtIO archive.
War Story: We migrated a critical Payroll Server (Server 2019) on a Friday night and skipped the injection. Four hours in the Proxmox Recovery Console fighting a registry hive because the mouse driver also failed. The VirtIO injection takes 20 minutes. The recovery takes 4 hours. Inject before you eject.
Before your production migration window, validate the full VirtIO injection sequence on a non-critical Windows VM in a lab environment. A DigitalOcean Droplet running KVM provides a safe environment to rehearse the driver injection and boot validation steps before you attempt them on production servers.
Execution: Moving the Bits
Option A: Native Import (Web/App Servers <500GB)
Proxmox VE 9.x allows you to mount vSphere storage directly via the web UI:
Datacenter → Storage → Add ESXi → Browse vCenter VMs → ImportThis is a streaming dd copy. If the network hiccups, you start over. Excellent for small VMs, risky for anything large or business-critical.
Option B: Clonezilla for Heavyweights (4TB SQL servers)
For large production databases, use Clonezilla:
- Boot source VM (VMware) into Clonezilla ISO
- Boot target (Proxmox) into Clonezilla Server in Receive mode
Why Clonezilla wins for large VMs: It understands filesystems. A 4TB drive that is only 200GB full transfers only the 200GB. The native import moves the entire 4TB block — a 20x difference in migration window duration for sparse disks.
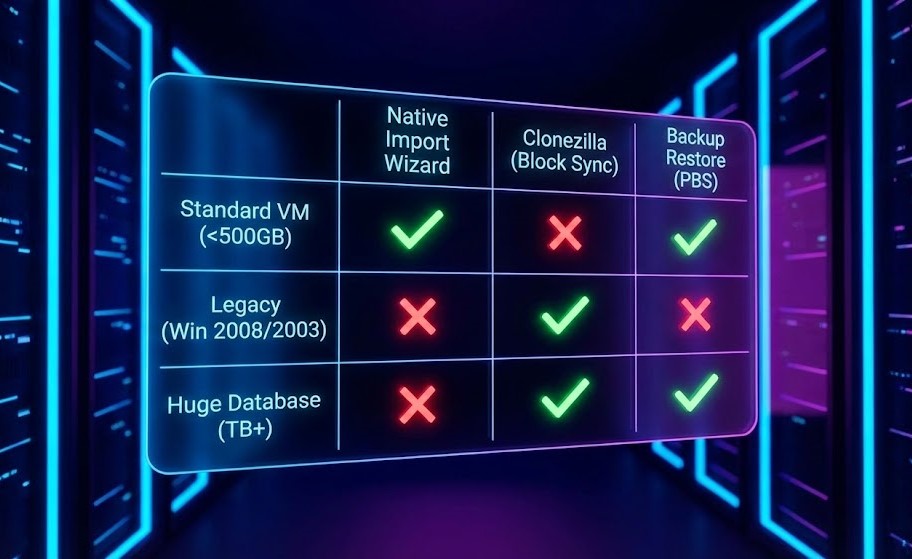
Figure 2: Select the tool based on downtime tolerance and data size, not convenience.
For the storage performance implications of what you’re migrating to — specifically ZFS vs Ceph I/O path differences and how cache mode selection affects SQL performance on Proxmox — see the Proxmox Storage Master Class: ZFS vs Ceph before you fill the drives.
Day 2 Operations (The Cache Pivot)
You booted. Don’t celebrate yet. Proxmox caching logic differs significantly from vSphere — and the wrong cache mode will silently destroy SQL performance.
- Write Back: Use if you have a battery-backed cache controller — delivers best performance with data safety
- None: Use for ZFS or Ceph — these handle caching internally and double-caching creates consistency problems
- Writethrough: Avoid on slow storage — every write is confirmed twice before acknowledging to the guest, tanking transactional database performance
Backup Reality — Deploy PBS Immediately: The first Proxmox Backup Server backup takes 4 hours. The second takes 3 minutes — block-level deduplication means only changed blocks transfer after the initial seed. This is your ransomware insurance policy. Do not run production workloads on Proxmox without PBS configured.
For the immutability architecture that makes PBS ransomware-resistant — and how it compares to Veeam and Rubrik at the storage layer — see the Immutable Backups 101 guide.
Once your storage and backup layers are stable, the scheduler and memory contention problems that emerge under production VDI and database load are covered in Resource Pooling Physics: CPU Wait & Memory Ballooning — the same run queue and ballooning physics apply to KVM on Proxmox as to ESXi.
Production Timeline
| Week | Focus | Deliverable |
|---|---|---|
| 1 | Discovery + Network | VLANs up, snapshot chains cleared |
| 2 | Pilot Migration | 10% VMs validated |
| 3 | Production Cutover | 90% VMs live on Proxmox |
| 4 | HA Validation | Full DR testing complete |
Once you survive Week 4, review the Proxmox HA Tuning Guide to fine-tune your watchdog settings and validate QDevice configuration under simulated failure conditions. Do not skip the pull-the-plug test — if you haven’t tested failure, you don’t have HA, you have hope.
Conclusion: The Open Box Era
Migration is not just about replicating vCenter — it’s about architecting for the future. Broadcom forced the industry’s hand, but the destination — an open, flexible, API-driven infrastructure — is arguably where we should have been all along.
You’ve moved from a black box where you pay Broadcom to solve problems, to an open box where you engineer the solution. The learning curve is steep. The control — and the budget — is finally yours.
Once your compute is stable, your next bottleneck will be storage IOPS. The ZFS Tuning for High-Performance SQL Workloads guide prepares you for Day 3 — when the migration is done and the performance optimization work begins.
For the complete structured progression — from Broadcom exit decision through Proxmox deployment through long-term operational stability — the Modern Virtualization Learning Path maps every step.
Additional Resources
Editorial Integrity & Security Protocol
This technical deep-dive adheres to the Rack2Cloud Deterministic Integrity Standard. All benchmarks and security audits are derived from zero-trust validation protocols within our isolated lab environments. No vendor influence.
R.M.
Senior Solutions Architect with 25+ years of experience in HCI, cloud strategy, and data resilience. As the lead behind Rack2Cloud, I focus on lab-verified guidance for complex enterprise transitions. View Credentials →
Get the Playbooks Vendors Won’t Publish
Field-tested blueprints for migration, HCI, sovereign infrastructure, and AI architecture. Real failure-mode analysis. No marketing filler. Delivered weekly.
Select your infrastructure paths. Receive field-tested blueprints direct to your inbox.
- > Virtualization & Migration Physics
- > Cloud Strategy & Egress Math
- > Data Protection & RTO Reality
- > AI Infrastructure & GPU Fabric
Zero spam. Includes The Dispatch weekly drop.
Need Architectural Guidance?
Unbiased infrastructure audit for your migration, cloud strategy, or HCI transition.
>_ Request Triage Session